
Tommerty
Founder of doras.to - Developer ❤️
He/Him
Cork, Ireland
Set up Flameshot for Fedora 43 Gnome
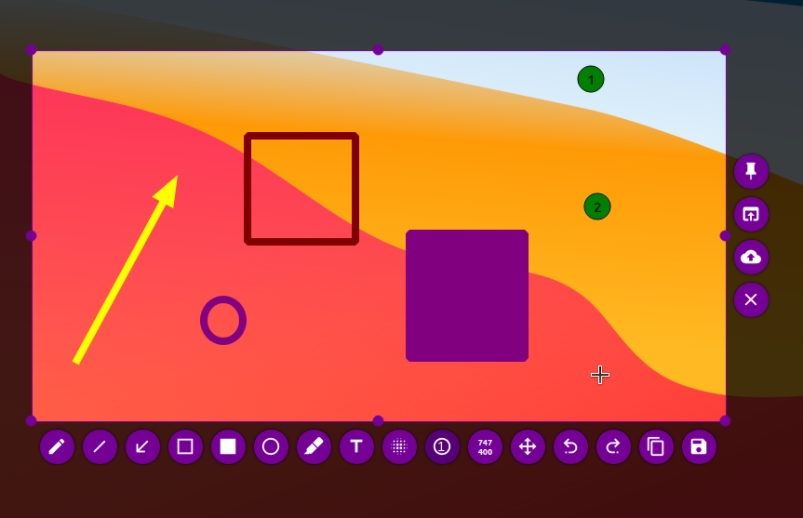
is my favorite screenshot tool no matter the operating system. It's incredibly powerful to not only just take screenshots, but to edit them after the fact. While I talk crap about Windows a lot, something that has become amazing is the snipping tool in recent years, and while KDE has Specticle, Gnome is missing out big time. The problem Gnome as it stands of the time of writing, has a powerful screenshot and screen recording tool. It's great for 90% of the time, unless you need to annotate something. If you need to add arrows, boxes, or blur something out, you better get used to opening something like GIMP, Krita, or Drawing. While I'm thankful these tools exist, they cause road blocks and friction. is by far the least learning curve to use, but in my experience I find it's sluggish and outdated. It doesn't even follow my dark theming set in Gnome. It's not had a release since 2023, and recent commits are months old. Setting up Flameshot It won't work out of the box, but there are some simple things you can do to get it working. Here's a simple step by step guide. Step 1. Install Flameshot via Flatpak This can be done from the software center or by running the following command in your terminal: Step 2. Granting permissions In order to use Flameshot with Wayland/Fedora 43/Gnome, you'll need to give it permissions. Run the following command: Step 3. Using Flameshot You can now trigger Flameshot with the following command: Creating a keyboard shortcut You can also set this up as a custom keyboard shortcut in Gnome to avoid needing to use the terminal. I did not resolve this myself, but stumbled across a Reddit post after much searching. Link below.
Tommerty
6th May, 2025
Posted on 6th May 2025

Streamdeck on Linux
One of my biggest pain points on moving over to Linux is that I do stream from time to time. In a post I mentioned my OBS setup, but one missing import piece of software I was craving was StreamerBot. If you know me, you know most of my background before becoming a web developer and building Doras was making YouTube content around awesome things with StreamerBot, so yeah, I love it, and I wanted it. Getting StreamerBot working So the awesome people over at StreamerBot had built a script to get things up and running . In my experience on Fedora, the installer script wasn't the best. StreamerBot would launch, but it wouldn't allow me to sign into Twitch. Digging around the Discord, I could see it was a Wine versioning problem. Before digging into messing with my Wine prefixes, I noticed that they also have a Lutris install script, and it worked first try! So now that we've StreamerBot up and running, what am I doing with it? Bitfocus Companion An awesome Doras community member told me about Bitfocus Companion. It's basically an open source Stream Deck software alternative. Now if you're not using a Stream Deck, you really don't need this. Just use the web decks with StreamerBot and call it a day! I however love my Stream Deck, but absolutely hate Elgato and their software. Triggering StreamerBot actions This was the hardest part, but luckily StreamerBot came in clutch with the vast amount of tools and features built in. I knew that StreamerBot had websocket server and client options, but something I always looked over was the HTTP server. I knew it would be perfect. To test, I opened up my terminal and started digging around the StreamerBot docs. I specifically landed on about the HTTP endpoints. Here's a simple POST request. The "id" is the "action ID" from StreamerBot, and hitting this URL I could see that the action was being hit. Now, the "key" is likely not needed and you can just do whatever you want there, however I opted to include it. Setting up my Stream Deck With Companion installed, I went looking to see how I could hit these endpoints, rather than just running commands in my terminal. I saw that there was an addon for "generic HTTP requests" however I couldn't get it to behave. Likely user error, but it should have been easier. I opted to go for an "internal: System: Run shell path (local)" action instead, and simply pasted the curl inside. I then realised that yeah, it'll be impossible to remember each action ID from a random string, so I created some variables inside Companion, and updated the curl command to follow. Example setup Here's a rough example of what I'm doing. I have the majority of my logic handled within a StreamerBot action, and then just have Companion trigger the action on a button press.
Tommerty
18th January, 2025
Posted on 18th Jan 2025

Run Affinity Designer 2 On Linux
One of my favourite softwares is Affinity Designer, and while yes there are software that is FOSS like GIMP and Krita, I just love Affinity. I'm a strong believer of "not supporting software that doesn't support me", I bought Affinity Designer before my switch to Linux. If I was looking for a software before I already bought this, then it would have been a non contender. But that's not the world we live in. I stumbled upon many times, but I could never get it up and running. Today however I found a that the creators have created a website documenting everything in much more detail, including steps for different package managers, so for me running Fedora, I could follow the dnf steps. Affinity Wine Documentation The steps I followed are outlined on the following site: While I could exactly copy/paste everything I done, I feel like that's a dis-justice to the people who compiled everything together, plus my information here may be outdated depending on when you're reading it. So the main purpose of this post is to really confirm that the steps provided here worked wonders for me. There were some quirks and fixes I implemented in order to get everything running smoothly that I'd be happy to share. Flashing/stuttering While running the app via my command rum affinity-photo3-wine9.13-part3 $HOME/.wineAffinity wine "$HOME/.wineAffinity/drive_c/Program Files/Affinity/Designer 2/Designer.exe" I did notice some flickering, especially when opening drop down menus for things like font selection. To fix this, I added renderer=vulkan to the end of the command, which seems to have stopped this. The documentation also suggests trying gl , but Vulkan worked perfect for me so I didn't bother testing that. Creating an alias Rather than running that long ass command every time, I decided to create an alias. I like having to launch it via the terminal so I can see whats going on under the hood and having a simple way to close/crash the software if needed, but that command is too long to remember. Step 1: Open up your .bashrc file inside your home directory Step 2: Create a new line with an alias like this: Step 3: Run source ~/.bashrc in your terminal to save the changes. Now anytime I run the command af-designer it will launch Affinity Designer 2. Backing up before getting started The guide goes over a lot of commands you need to run on your machine like installing packages and compiling a custom version of wine. Before doing anything like this, I strongly suggest and recommend that you've a backup solution in place. I personally use Pika Backup. It's a simple Flatpak application that I have to run daily backups and uploads them on my Nextcloud instance. This way if something goes horribly wrong, you've a way out. Additionally, it's important to remember that Linux is nothing but a bunch of files. A lot of Linux users (myself included) backup our "dotfiles" to places like GitHub. This means that if a machine wipe is needed, we don't need to reconfigure some things like Neovim, Hyprland, etc. I personally use the tool Chezmoi for this.
Tommerty
5th December, 2024
Posted on 5th Dec 2024
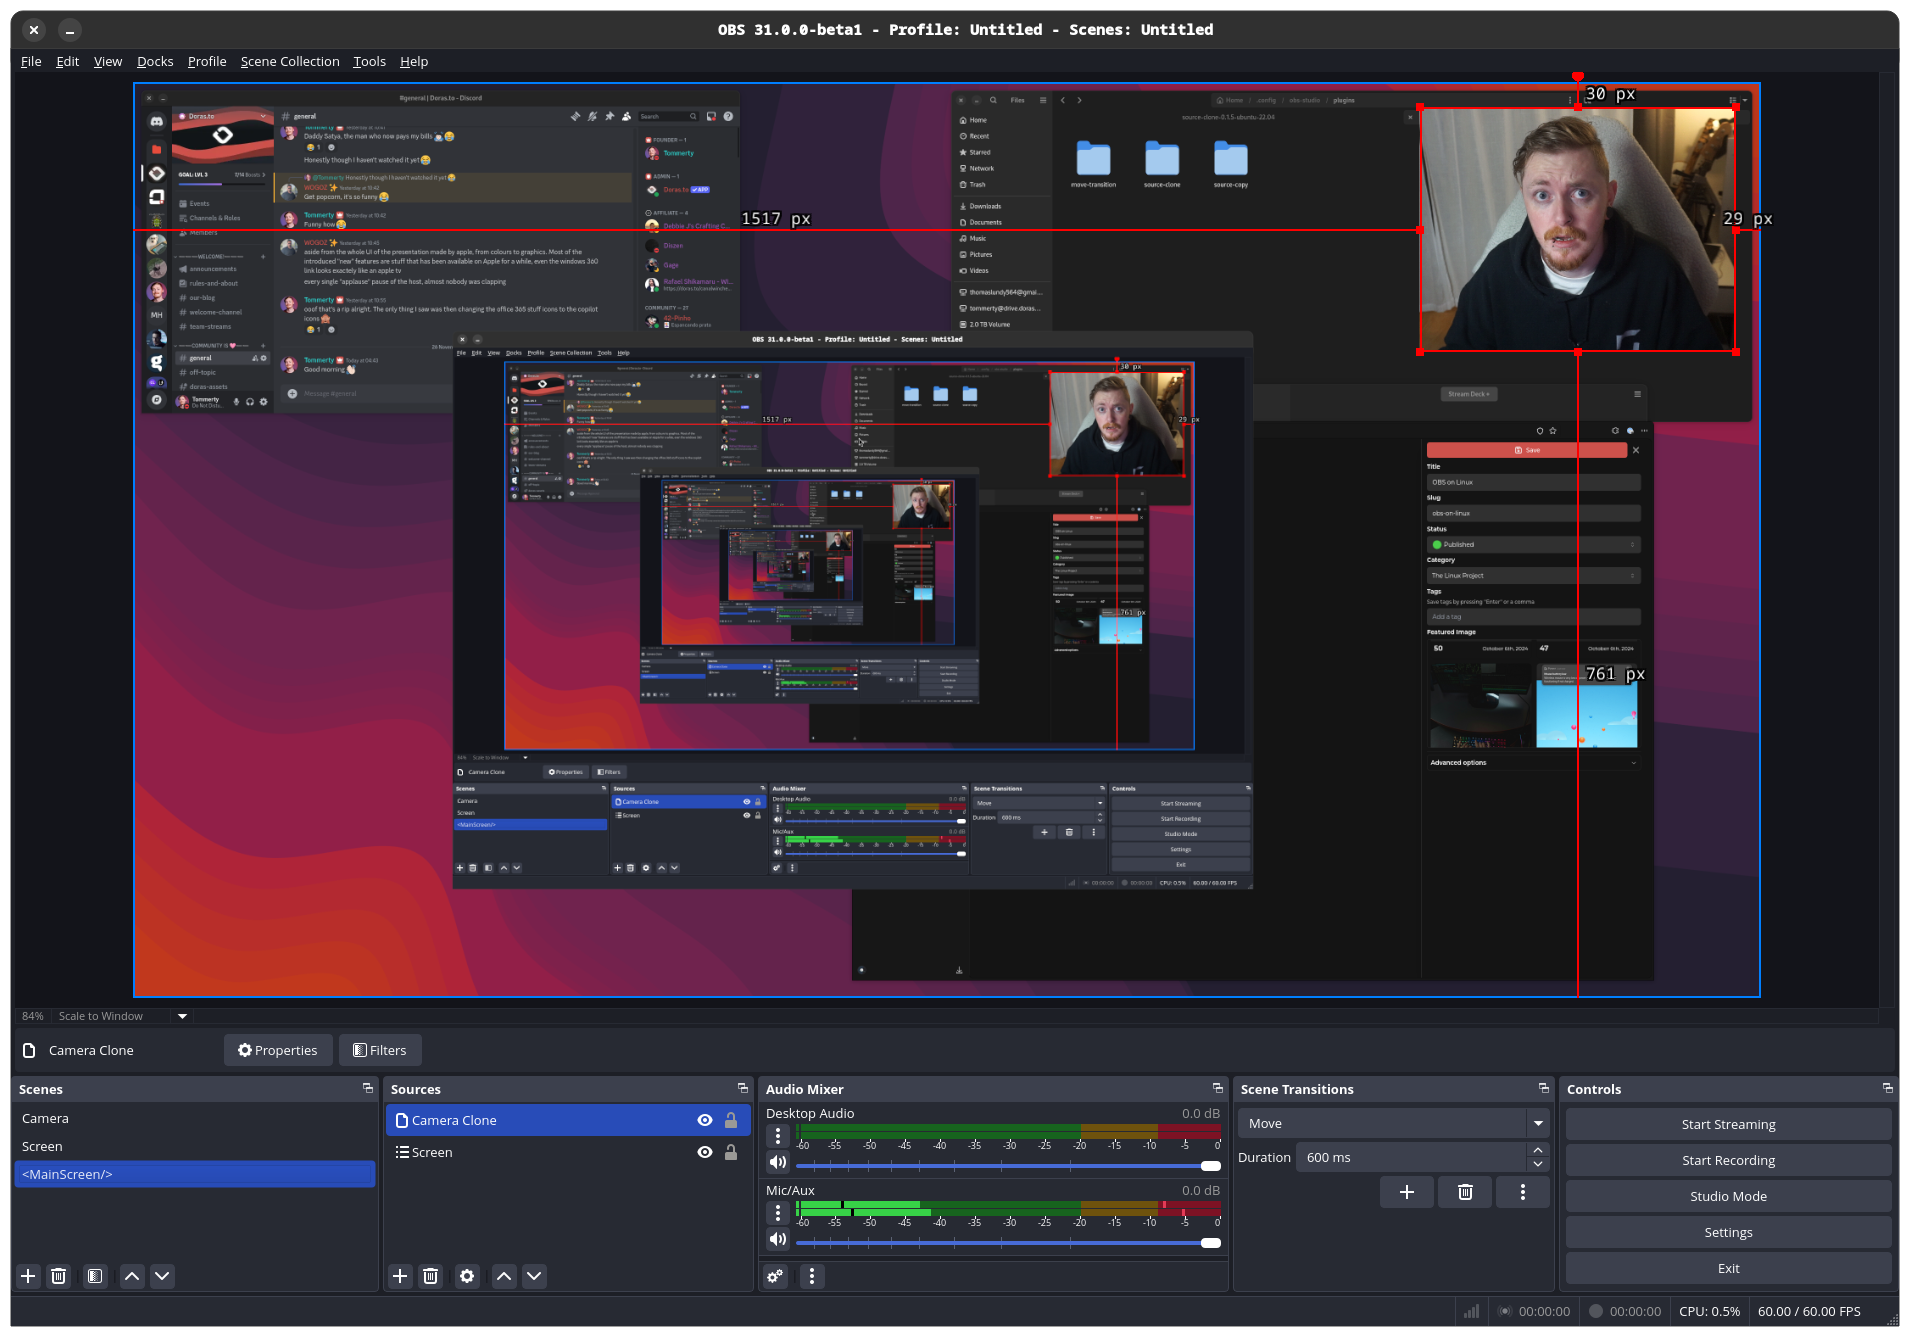
OBS on Linux
We kick off today at a brisk 5am. I got about 3 hours sleep and my body decided to wake up, so I agreed to it and got to work. Now it's not everyday I do stream, but the odd time I stream on Twitch showcasing my development process of Doras. So, first things first was setting up OBS! In my previous post I found a solution to get my Streamdeck working, and I wanted to create a similar OBS setup on Linux where I just have one screen and use my Streamdeck for moving my camera around. When installing OBS, I decided to go with the native RPM package rather than the Flatpak. I struggle a little bit finding the file locations for Flatpaks and didn't want to deal with it so for now I'm using the native RPM rocking OBS 31.0.0-beta1. My Camlink instantly worked and was able to get my camera to show, and then went over to the OBS forums. Luckily, Exeldro, one of the most promanant OBS plugin developers has plugin files for Linux. While the folders are labelled for Ubuntu 20.04 and 22.04, I had no problem copying the files over to my /home/tommerty/.config/obs-studio/plugins directory. They instantly worked, so I went ahead and started sponsoring Exeldro on GitHub, and I honestly suggest you do the same. It's important to support open source developers, as we wouldn't have these incredible tools without them. He has a Doras profile, so please consider checking him out All in all, I'm quite happy! I've got my basic OBS setup without StreamerBot, but I do plan on getting that set up too. I've a few options: Still undecided on what to do, ideally I'd like to get it running on Linux if I can figure out how to authenticate without errors. I guess that will have to be another blog post. Read next: Part 1, installing Fedora Linux and getting a basic system going
Tommerty
26th November, 2024
Posted on 26th Nov 2024

Part 1: Installation
Like anything you plan on doing that regards wiping hard drives, it all starts with ensuring everything is backed up. I have two NVME SSDs in my main PC, one of which has Windows on it, and the other is my storage drive that's all backed up to my Nextcloud instance. Because I'll want those files on Windows and should I need to revert back to it for any reason, it's worth updating the mount over to my C drive. I also noticed it's where my StreamerBot files lived, so I better move those over too. Everything else left on the drive can be grabbed again, it's mostly just npm packages for local development. Now, it's time to get my OS. For simplicity, I settled on using Fedora. I like Fedora, and I like Gnome. With my 42" 4k HDR monitor, I also think Wayland is my best bet, so Fedora running the latest Gnome desktop environments is likely the best use case for me. I've not researched Linux' HDR support, but I guess I can go in blind and figure things out. It's not a feature I care too much about anyway personally. This is a monitor I use for developing and the odd gaming session, so whatever! From here, I'm safe to head over to the Fedora website, and download the Fedora Media Writer, a handy tool to download and flash the Fedora ISO image and creates the bootable USB for me. After this sentence, things are going to be written from the Fedora side... Wish me luck. We're on Fedora! I've just completed a basic install of Fedora, and got 1Password up and running so I could sign in. What I thought was really cool was that instantly Fedora/Gnome knew my MX Master mouse was dying, and prompted me to plug it in. I've also installed the Zen browser which is my browser of choice. I saw during the download process there was options for "Optimized" and "Generic" installation. I chose Optimized and went to download the Flatpak for it, but I got a popup saying that it'll be the "generic" one instead, so I opted for the AppImage instead. I generally don't use AppImages and use Flatpak, but it was a seamless one line of code to copy/paste and seems to be working well so I'll leave it alone. The only problem is that I can't tell Gnome to make it my default browser, but there is likely another way I can set this outside of Gnomes settings GUI. All in all things are going smooth. It detected all my hardware, prompted me for WiFi passwords, but it's also set up on my wired connection. End of day one Ok, I got a lot done. I've managed to find a to do some basic things, I got my Kitty terminal all set up, all my development tools installed, and have some basic stability and usability. All in all this ended up being a perfect day one. I still have all my audio things to get configured, test out some gaming, and just general real world testing. Regarding the HDR, couldn't see an option but to be honest I really don't care, everything looks beautiful. Going forward future blog posts will likely be task specific rather than daily posts, but I'm looking forward to sharing everything, and letting you know about other cool things I stumble upon! I'll also be posting updates on my Bluesky if you're interested! Read next: OBS on Linux
Tommerty
25th November, 2024
Posted on 25th Nov 2024
The Linux Project: Prologue
Over the years, I've been very fond of Linux. I love the aesthetic, the philosophy, and everything in between. While I don't agree that most people should use Linux as their daily machine, this is a forever changing mindset. I used to daily drive Linux between 2014 until 2020 when I got into streaming and a bit more into competitive gaming that did not have Linux support due to kernel level anti cheat software, but times have changed. I spend most of my time playing offline games, and web development (like the site you're reading this blog post on). Why now? I'm fortunate enough to have a few machines in my house. I have my main gaming rig, a Snapdragon X laptop, a Macbook, and a PC that I'm planning on repurposing into a home server for some automation tools & hosting some things around the house. The objective is simple: make my machines act as how I want them to be, and see what I can do. I plan on making everything as open source as possible, and documenting my progress on this. We're also at a time of my life where that by the time you're reading this, me and my partner are moving into our first mortgaged house. I've dreamed of building an impeccable network and software solutions that we'll use on our day to day, and there's no better way to get sucked into the FOSS and Linux systems than literally making my main machines part of that. I'm an automation junkie, and love spending 10 hours to turn a 10 minute task into a 2 minute task. The Objective Join me on this journey and we'll be discussing everything, documenting everything, and maybe even providing some surface level tutorials while on this journey. Part one will be getting my main system set up. I'm planning on using Fedora, and I have some desired outcomes: Let's see what we can do. We don't have a commenting system for blogs yet, but if you've any thoughts, questions or suggestions, you can find me on the Doras Discord. Read next: Part 1, installing Fedora Linux and getting a basic system going
Tommerty
25th November, 2024
Posted on 25th Nov 2024